Showing posts with label how to. Show all posts

Saturday, 29 September 2018

I’ve searched a lot on Google how to do certain git actions, and this actually motivated me to write this post. This may not be so useful for a person who is a PRO in git, but I tried to list out all the git commands which will definitely benefit a newbie.


Here are the list of git commands which is going to get covered in this Post:


Clone
Stash Changes
List stashes
Apply stash
List branches
Create Branch
Commit
Push
Pull
Checkout Branch
Config
Ignore Filemode changes


Git Clone:
git clone [url]


Git clone with custom directory name:
git clone [url] [directory name]


Git Clone with password:
git clone https://username:password@xyz.com/abc/repository.git


Stash Changes:
git stash save
git stash save [stash name] 
This command stash changes with name

List all stashes:
git stash list


Apply a stash:
git stash pop
git stash apply


List branches:
git branch
Note:  The one which is highlighted is the current branch


Create Branch:
git branch [branch name]


Commit:
git commit -m “[ commit message]”


Push changes:
git push origin [branch name]


Pull changes:
git pull origin [branch name]


Checkout branch:
git fetch && git checkout [branch name]


Config:
git config –global user.name [name]
git config –global user.email [email address]


This command sets the author name and email address to be used with your commits.


Ignore File mode changes:
git config core.fileMode false

If you need or know some more essential git commands, mention it in comments. I am always open to learning. 

Useful Git Commands for developer

Friday, 6 October 2017

Having a complete list of your site is incredibly important in the current search landscape. You need not use a tool to get all the links of your site. Use the following PHP code to get all the links

<?php
$html = file_get_contents('http://www.kayalspot.blogspot.in');
$dom = new DOMDocument();
@$dom->loadHTML($html);
// grab all the links on the page
$xpath = new DOMXPath($dom);
$hrefs = $xpath->evaluate("/html/body//a");
for ($i = 0; $i < $hrefs->length; $i++) {
 $href = $hrefs->item($i);
 $url = $href->getAttribute('href');
 echo $url.'<br />';
}

How to get all links from a site

It is common to upload the images dynamically to the websites. But when we upload the large file size image on the website, it consumes a lot of time while loading. So the developer should write the code to reduce the image file size while uploading the image dynamically to the website. Using PHP, you can easily reduce the file size of those uploaded images during  time of upload. Of course, when reducing the file size we sacrifice the image quality.

seo-image-optimization

Code to reduce file size for the image:
<?php 
 function compress($source, $destination, $quality) {

  $info = getimagesize($source);

  if ($info['mime'] == 'image/jpeg') 
   $image = imagecreatefromjpeg($source);

  elseif ($info['mime'] == 'image/gif') 
   $image = imagecreatefromgif($source);

  elseif ($info['mime'] == 'image/png') 
   $image = imagecreatefrompng($source);

  imagejpeg($image, $destination, $quality);

  return $destination;
 }

 $source_img = 'source.jpg';
 $destination_img = 'destination .jpg';

 $d = compress($source_img, $destination_img, 90);
 ?>
$d = compress($source_img, $destination_img, 90);
This is just a php function that passes the source image ( i.e., $source_img ), destination image ( $destination_img ) and quality for the image that will take to compress ( i.e., 90 ).
$info = getimagesize($source);
The getimagesize() function is used to find the size of any given image file and return the dimensions along with the file type.
Example:
$info = getimagesize($source);
print_r($info);
Output:
Array ( [0] => 1280 [1] => 768 [2] => 2 [3] => width="1280" height="768" [bits] => 8 [channels] => 3 [mime] => image/jpeg )
$image = imagecreatefromjpeg($source);
$image = imagecreatefromgif($source);
$image = imagecreatefrompng($source);
All the above functions are used to create a new image from the given file or URL. These functions are used to return an image identifier representing the image obtained from the given file name.
imagejpeg($image, $destination, $quality);
imagejpeg() function is used to create a JPEG file from the given image.
Syntax: imagejpeg ( $source_image, $destination_image, $quality )
Quality ($quality): quality is optional, and ranges from 0 (worst quality, smaller file) to 100 (best quality, biggest file). The default range is 75.
Note:
The GD library is used for dynamic image creation. From PHP we use with the GD library to create GIF, PNG or JPG. This is very important to run all the image creation function in PHP. If your server doesn’t support the GD library then all the above functionality related to the image creation will not work.
Complete code to reduce the image file size:
<?php
 $name = ''; $type = ''; $size = ''; $error = '';
 function compress_image($source_url, $destination_url, $quality) {

  $info = getimagesize($source_url);

      if ($info['mime'] == 'image/jpeg')
           $image = imagecreatefromjpeg($source_url);

      elseif ($info['mime'] == 'image/gif')
           $image = imagecreatefromgif($source_url);

     elseif ($info['mime'] == 'image/png')
           $image = imagecreatefrompng($source_url);

      imagejpeg($image, $destination_url, $quality);
  return $destination_url;
 }

 if ($_POST) {

      if ($_FILES["file"]["error"] > 0) {
           $error = $_FILES["file"]["error"];
      } 
      else if (($_FILES["file"]["type"] == "image/gif") || 
   ($_FILES["file"]["type"] == "image/jpeg") || 
   ($_FILES["file"]["type"] == "image/png") || 
   ($_FILES["file"]["type"] == "image/pjpeg")) {

           $url = 'destination .jpg';

           $filename = compress_image($_FILES["file"]["tmp_name"], $url, 80);
           $buffer = file_get_contents($url);

           /* Force download dialog... */
           header("Content-Type: application/force-download");
           header("Content-Type: application/octet-stream");
           header("Content-Type: application/download");

   /* Don't allow caching... */
           header("Cache-Control: must-revalidate, post-check=0, pre-check=0");

           /* Set data type, size and filename */
           header("Content-Type: application/octet-stream");
           header("Content-Transfer-Encoding: binary");
           header("Content-Length: " . strlen($buffer));
           header("Content-Disposition: attachment; filename=$url");

           /* Send our file... */
           echo $buffer;
      }else {
           $error = "Uploaded image should be jpg or gif or png";
      }
 }
?>
<html>
     <head>
          <title>Php code compress the image</title>
     </head>
     <body>

  <div class="message">
                     <?php
                      if($_POST){
                          if ($error) {
                              ?>
                              <label class="error"><?php echo $error; ?></label>
                        <?php
                              }
                         }
                     ?>
                 </div>
  <fieldset class="well">
                  <legend>Upload Image:</legend>                
   <form action="" name="myform" id="myform" method="post" enctype="multipart/form-data">
    <ul>
                <li>
      <label>Upload:</label>
                                   <input type="file" name="file" id="file"/>
     </li>
     <li>
      <input type="submit" name="submit" id="submit" class="submit btn-success"/>
     </li>
    </ul>
   </form>
  </fieldset>
 </body>
</html>
I hope the above-mentioned PHP code could be beneficial in reducing the image file size while uploading it to save your precious time. I believe the topic discussed here is quite useful to everyone who reads it!
Source: https://www.apptha.com/blog/how-to-reduce-image-file-size-while-uploading-using-php-code/

How to optimize images for SEO - PHP

Monday, 15 June 2015


First You need to install XAMPP to install Drupal.


STEP #1: Type “localhost/xampp” on the address bar. Click on the drupal symbol.


STEP #2: Scroll down to see the Drupal. Click on Download(Recommended)


STEP #3: Select No Thanks, just take me to the download”. It starts downloading.


STEP #4: Click on the downloaded .exe file 


STEP #5: Select the language.

STEP #6: Click on Next.


STEP #7: Click on Next.


STEP #8: Enter the required details and click on Next.


STEP #9: If you would like to change the Site Name, change it. Click Next.


STEP #10: Click on Next.


STEP #11: Click on Next.


STEP #12: Drupal is installing


STEP #13: Click on Finish.


STEP #14: Now, Drupal is installed on your System

How to install Drupal in XAMPP

Sunday, 14 June 2015

First , You need to install XAMPP on Windows to install Joomla. 


STEP #1: Start Apache and Mysql in XAMPP Control Panel.


STEP #2: Type "localhost/xampp" on address bar. Now you can see some symbols. Click an any one. The symbol within RED ellipse is JOOMLA logo.


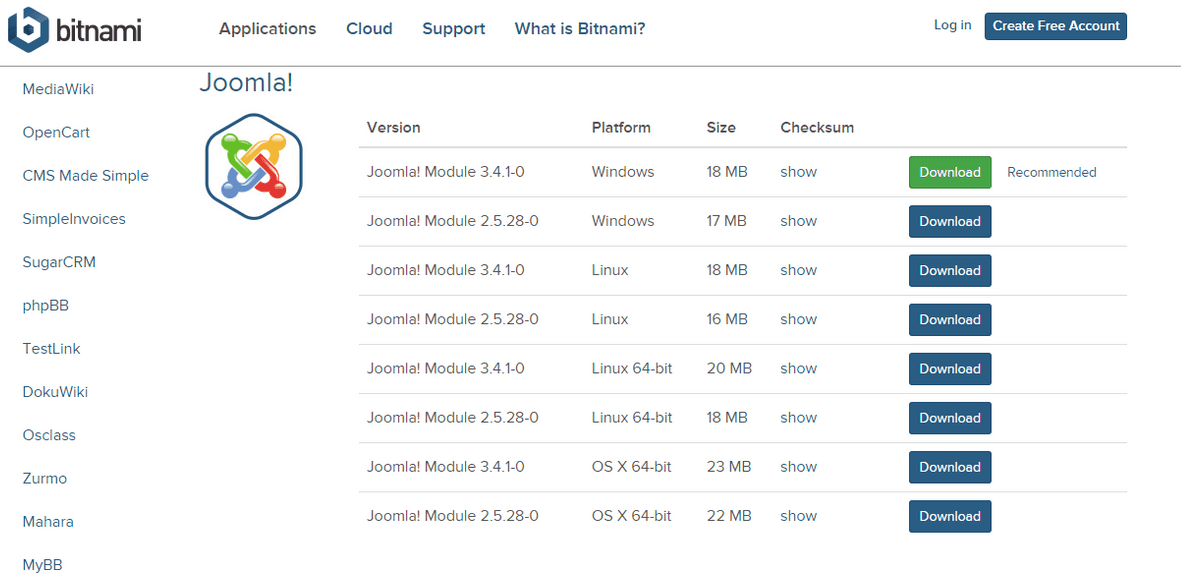
STEP #3: Scroll down to see the below image. Click on Download ( Green Color)


STEP #4: Select "No thanks, just take me to the download". It starts downloading.


STEP #5:  Run the downloaded .exe file


STEP #6: Select the language and Click OK.


STEP #7: Click Next.


STEP #8: Click Next.


STEP #9: Change the details if necessary. Click Next.


STEP #10: Change the Site name if necessary. Click Next.
                                     

STEP #11: If you don't want mail support. Click Next. Continue from STEP #14.


STEP #12: If you want mail support, Enable the check box and Click Next.


STEP #13: Enter the correct details and Click Next.


STEP #14: Click Next.


STEP #15: Click Next.


STEP #16: Now it is installing.


STEP #17: Click Finish.


STEP #18: Now JOOMLA is successfully installed on your system.


How to install JOOMLA in XAMPP

Tuesday, 9 June 2015

XAMPP is an open source cross platform web server. XAMPP stands for;
  • X – cross platform operating systems (it can run on any OS  Mac OX , Windows , Linux )
  • A – Apache.
  • M – MySQL
  • P – PHP
  • P – Perl 


STEP #1: Download the XAMPP installer at https://www.apachefriends.org/download.html. Now the .exe file gets downloaded.


STEP #2: Click the downloaded file(.exe file) to install XAMPP on Windows.


STEP #3: Select the language.


STEP #4: Click on Next.


STEP #5: Click Next


STEP #6: If you would like to change the folder that xampp should reside, then change it and Click Next. Otherwise, Simply Click Next.


STEP #7: Click Next.


STEP #8: Click Next.


STEP #9: Now it starts installing.


STEP #10: Click Finish


STEP #11:Now  The Control Panel is displayed.


STEP #12: Start Apache, Mysql etc.


STEP #13: Type "localhost/xampp" in the address bar. Select language.


STEP #14: Now, you can see the message "Congratulations:
You have successfully installed XAMPP on this system!"


How to install XAMPP on Windows

 
KayalSpot © 2015 - Designed by Templateism.com